Canon Sure-shot Classic 120
Instructions taken and translated?! from this Russian page.
Page #2 of 4.
|
Instructions taken and translated?! from this Russian page.
|
|||||||
|
|
|
|||||||
| BASIC INSTRUCTIONS (Page #2) | |||
|
|
|||
|
|
|
||
|
|
| •USE OF THE ZOOM. | |||
|
|
|||
|
|
|||
| <top of page> |
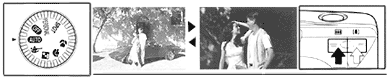
| •CENTRAL POINT FOCUSING. | •SHOOTING AN OFF-CENTER SUBJECT. | |||
In the modes (
|
|
|||
|
|
|
|
||
| <top of page> |
|
|
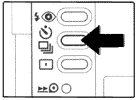
•CONTINUOUS PHOTOGRAPHY. |
•USE
OF THE SELF-TIMER.
|
||
|
|
The self-timer makes possible for you to take a photograph,
when you are located at a distance from the camera. When the camera is
attached to a tripod or other support.
To set the camera to self-timer mode:
|
|||
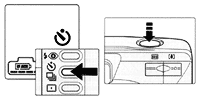
| •REMOVING THE FILM | ||||
|
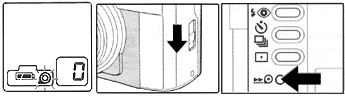
The film automatically rewinds at the end of roll. The frame numbers
count downwards to "0" while film is rewinding. To rewind film
mid-roll press the
Always check, the symbol ( |
||||
| <top of page> |