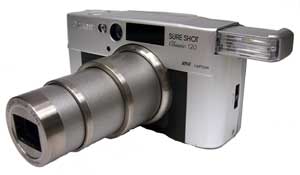
Canon Sure-shot Classic 120
Instructions taken and translated?! from this Russian page.
Page #1 of 4.
|
|
Instructions taken and translated?! from this Russian page.
|
|||||||
|
|
||||||||
| START HERE #1 | |||
|
|
|
||
|
|
|
||
|
|
| PRECAUTIONARY MEASURES | |||
|
|
|||
If you use a flash continuously (30 sec or more), when there's no film in the camera, the camera will automatic turn off the flash to avoid overheating. If this occurs, turn off camera and wait several minutes before, turning camera on again. |
|||
| <top of page> |
| CAMERA SPECIFICATIONS. | |||
|
|
||
Extra Specifications For Caption Version.
|
|||
| <top of page> |
|
|
FASTENING OF THE STRAP/ PROTRUSIONS ON THE BUCKLE OF STRAP/ QUICK START | ||
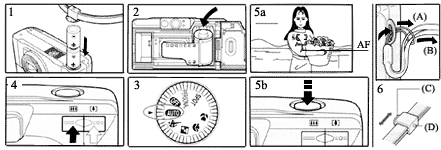 So that you don't drop the camera during use, fasten to it the accompanying strap. Fasten Strap, as shown in the steps "A" &"B". The strap has a buckle shown in 6. with: a large protrusion "C" for the removal of the battery cover. Use this protrusion in order to open and to shut the cover of section for the batteries. a small protrusion "D". for the buttons under the back cover flap. Use this protrusion, in order to press on the small buttons in the section under the cover. ("Select","rewind" etc.) |
|||
|
|
|
||
| <top of page> |
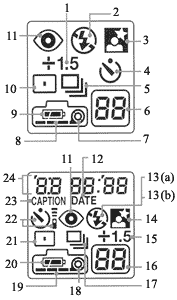
| DESIGNATION OF PARTS | ||||||
 |
||||||
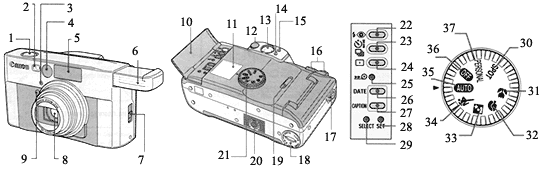
CAMERA PARTS
|
Section of the buttons.
|
The "Best Shot" Dial Selector.
|
|
|
||
|
|
|
|||||
| <top of page> | ||||||
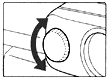
| FRAMEWORK OF THE VIEWFINDER | DIOPTRIC ADJUSTMENT | ||
 |
 |
||
| 1. Normal frame. With normal photography arrange
your photographs, using this frame. 2. Close-up frame guide.With close-up photography arrange your photographs within these markers. 3. Normal AF focusing guide points, aim this area at subject to focus it. 4. Close-up AF focusing guide points, for close-up focusing. |
Turn the knob to aid your vision. |
||
| <top of page> |
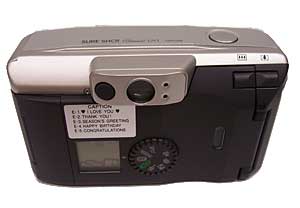
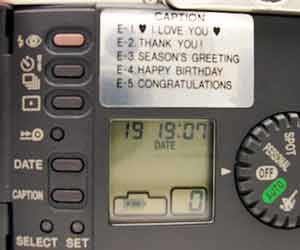
| THE LCD DISPLAY. | |||
|
|
 |
||
| <top of page> |
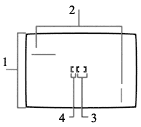
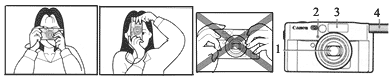
| AS IT IS CORRECT TO HOLD PHOTO-APPARATUS. | |||
 |
|||
BE CAREFUL NOT TO OBSTRUCT
THESE PARTS OF THE CAMERA.
|
|||
| <top of page> |
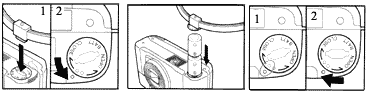
| INSTALLATION OF THE BATTERIES. | LOADING OF THE FILM | ||
 |
 |
||
|
Power source: Two CR2 (3v)
|
To Open the rear cover .
|
||
| <top of page> |